

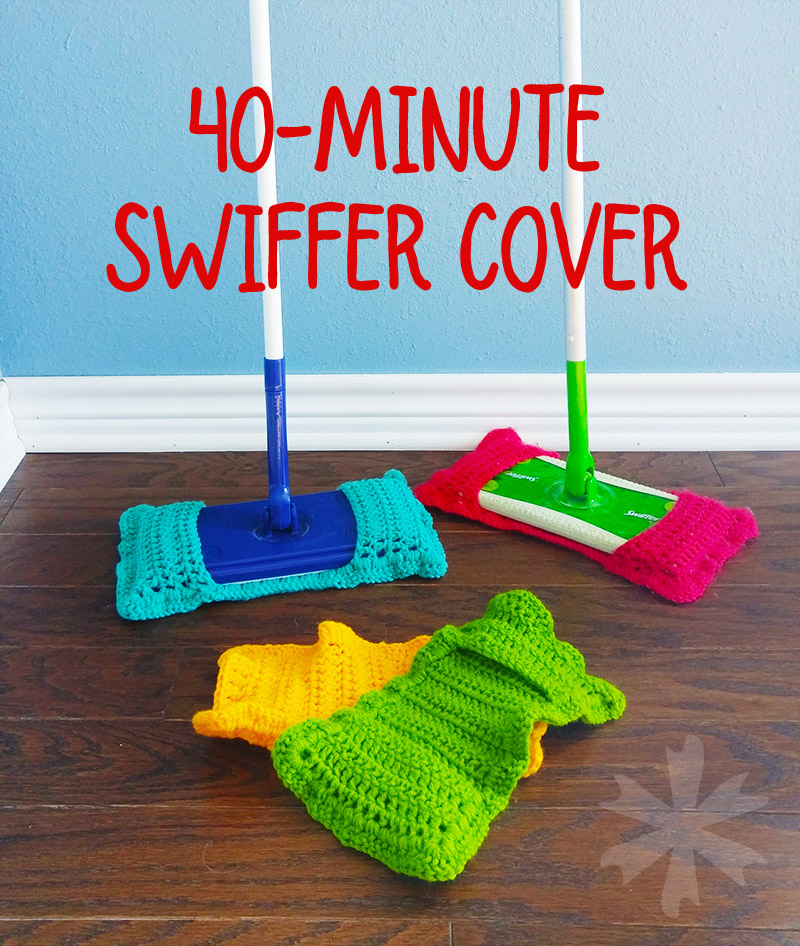
40-minute swiffer cover
I'm not a big fan of 'disposable' stuff and try to use environmentally responsible products whenever possible. Once upon a time, I crocheted a Swiffer cover from someone else's pattern, and it was fine. It worked well enough, but I wasn't enamored enough to make another-- mostly because it required several steps to construct, and then didn't fit well. It was designed to be slightly smaller than then mop head (the pattern had measurements rather than stitch/row counts), presumably to fit snugly. It had some baubles built in for a nubbly effect, but I didn't find them particularly useful. When we moved, it got packed up with some other cleaning supplies.
 While we were living in limbo, I used up all the wet-mop pads in the tiny pack I'd purchased for the final clean of the rent house, so I decided I needed to crochet another reusable cover. While watching a movie on DVD one night, I dug out a long-abandoned afghan-in-progress that had somehow made it to the limbo house, unraveled a few rows, and used the yarn to devise a cover that I liked. Mine has no nubblies, but it does have an extra 'skirt' around the outside so it's always bigger than the mop head and can get into those floor-meets-cabinet corners. It worked out so well, I made another. And another.
And another.
I LOVE THESE.
Talk about scrap stash buster! Which makes them effectively free!
I've made perhaps a dozen by now? I have some for upstairs and some for downstairs, and extras for when I get behind with laundry (which almost never happens...*ahem*). All of our floors are hard-surface (no carpet, just rugs), so they get used a lot.
Have I mentioned that I love these? I love that I can use them damp or dry, plain water or with a mild detergent or spray. I love that if I'm using them damp, I can rinse, squeeze and still use the same one. I love that I can just toss them in the washing machine.
Also. They work up SO FAST! Seriously, 40 minutes is generous, allowing time to consult the pattern, to join the next piece of scrap yarn, etc... The second and third cover will take a seasoned crocheter less than 30 minutes to make.
These work great on Swiffer and the GreatValue Walmart version as well--and probably others that I don't own--let me know if you try this on a different brand!
TIP: On my first ones, I just wove in the ends of the yarn, like I do on hats and afghans. The ends WILL COME OUT. Which is fine, I just knotted them tight and retucked them in. Leave longer tails on purpose so they're easy to re-tuck.
What you'll need:
- Cheap worsted-weight yarn. Scraps, even yarn reclaimed from other abandoned projects.
- Crochet hook. I used an I/5.5mm hook
- Yarn needle (optional)
Text only pattern (scroll down for pattern with pics)
Ch 17
DC in 3rd ch from hook. DC across (15 DC, 16 st incl 2ch)
*Ch 2 and turn, 15 DC across*
Repeat ** until you have a total of 27 rows DC
Fold over 5 rows
1 slst to anchor, ch 2
Turn to work from what will be floor side.
3 DC row posts together x4
6 DC in corner
2 DC between each st on short side (on straight line between rows 5 & 6)
6 DC in corner
3 DC row posts together x4
3 DC in each of next 7 row post spaces
Fold over last bit (5 rows doubled)
3 DC row posts together x4
6 DC in corner
2 DC between each st on short side (on straight line betwn rows 22&23)
6 DC in corner
3 DC posts together x4
3 DC in remaining row post spaces
Slst on top of 1st Dc
Fasten off tightly, knotting several times, weave/tuck in ends
Pattern with pics
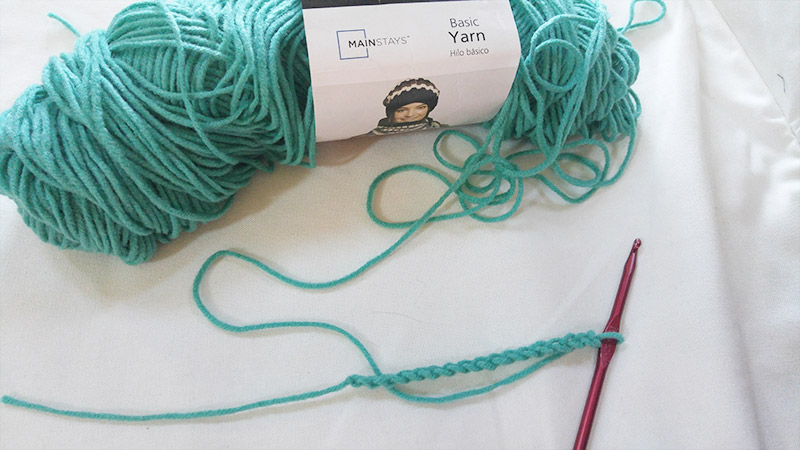 CH 17
CH 17
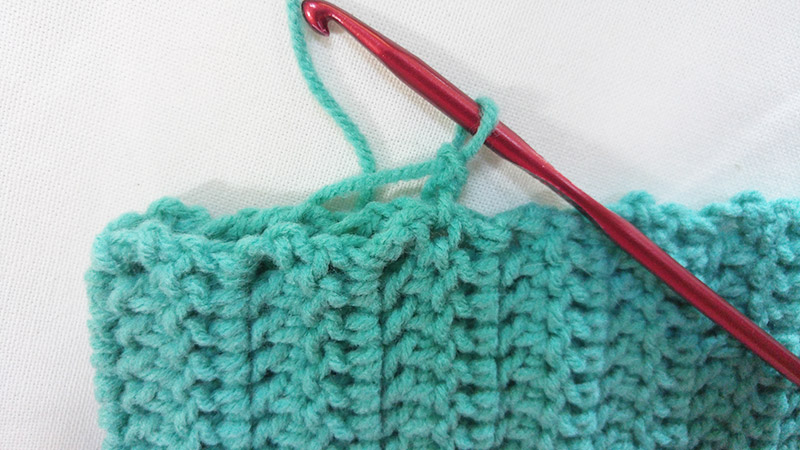
DC in 3rd CH from hook, DC across in next 14 stitches. (*)CH2 and turn. 15 DC across.
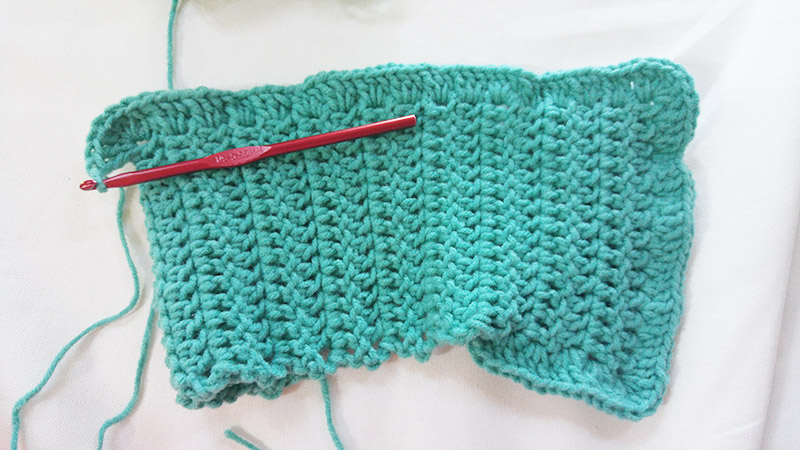
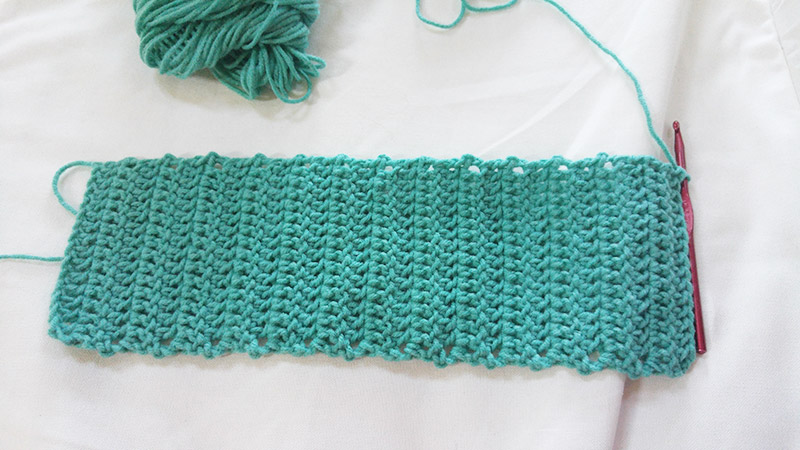 Repeat DC rows until you have a total of 27 rows of DC
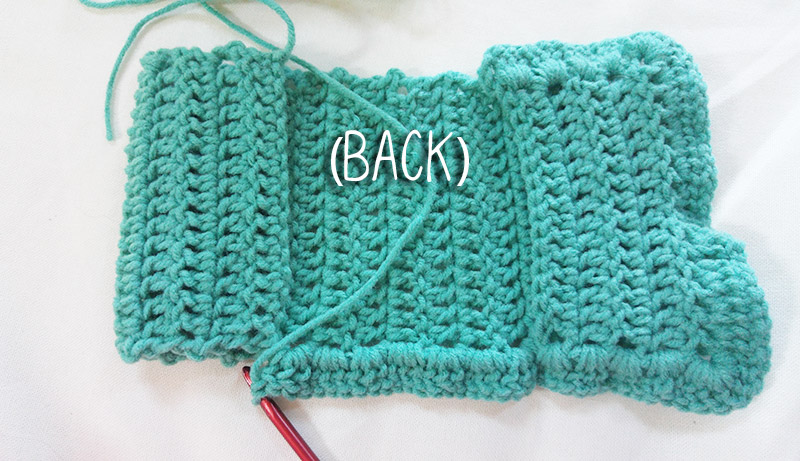
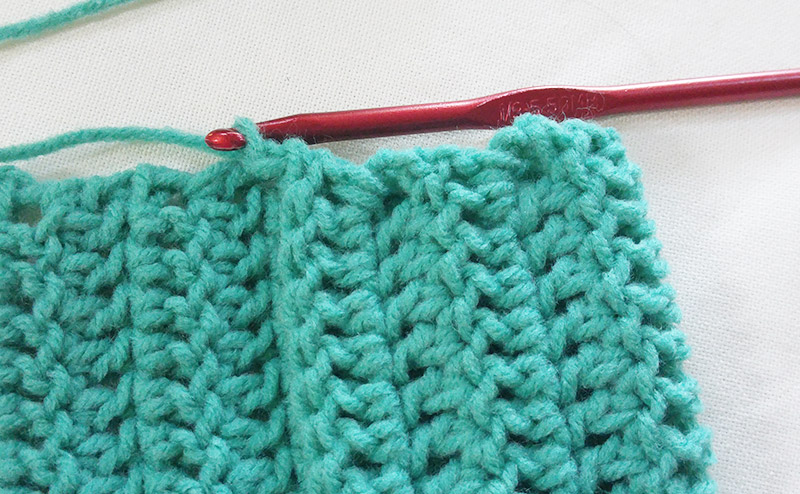 Fold over 5 rows. Slip-stitch to anchor.
 CH 2. Turn to work from what will be floor side.
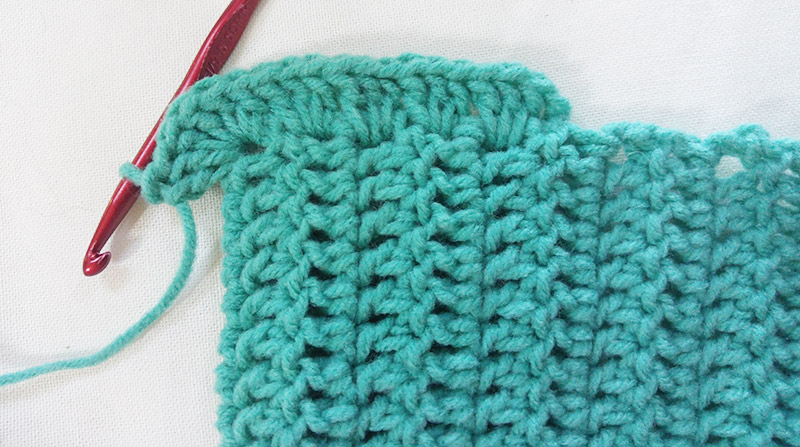 3 DC row posts together x4
6 DC in corner
 2 DC between each st on short side (on straight line between rows 5 & 6)
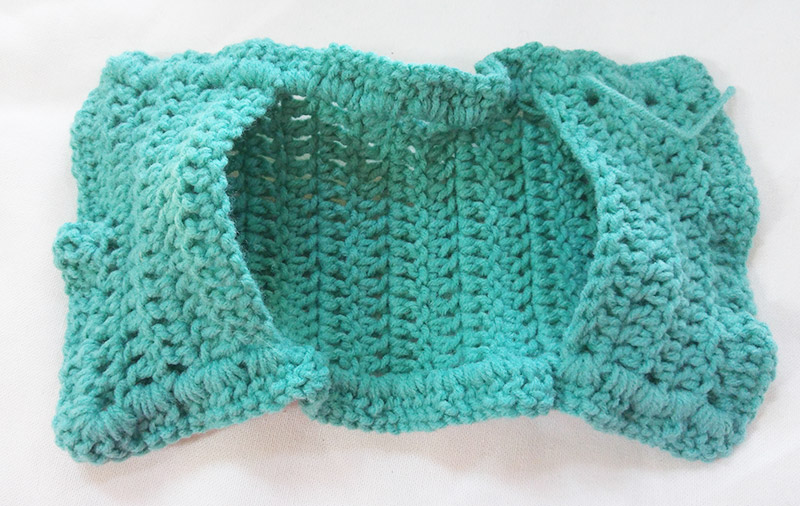
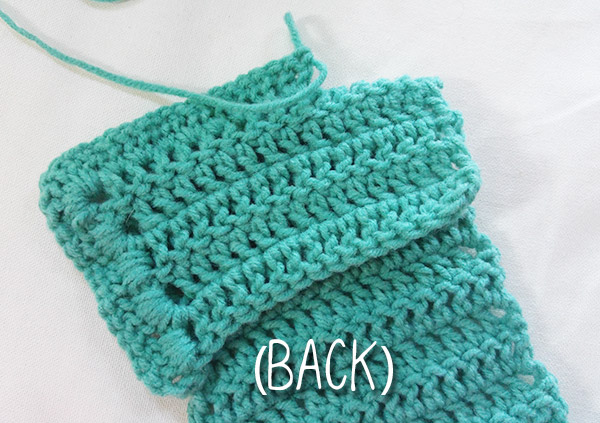 (Here's what it looks like from the other side at this point)
 6 DC in corner
3 DC row posts together x4
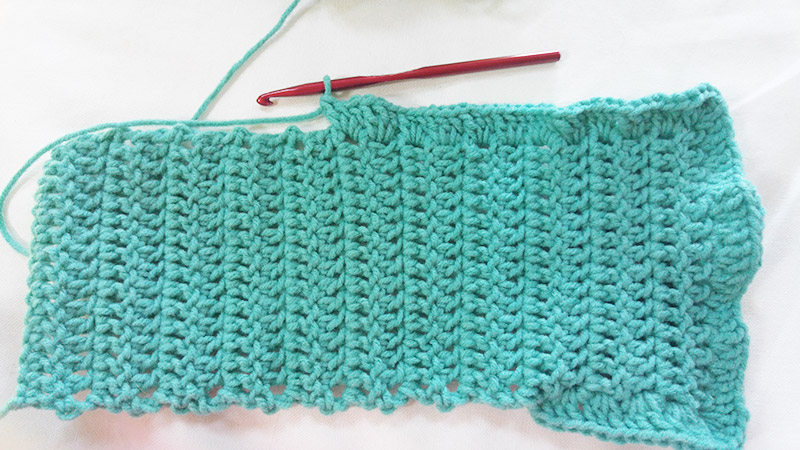
3 DC in each of next 7 row post spaces
 Fold over last bit (5 rows doubled)
 3 DC row posts together x4
6 DC in corner
 2 DC between each stitch on short side (on straight line between rows 22&23)
6 DC in corner
3 DC posts together x4
3 DC in remaining row post spaces
Slip-stitch on top of 1st DC
Fasten off tightly (triple knot----else it will come loose eventually)
Weave in ends.

DONE!